To troubleshoot being locked out of your Lenovo laptop keyboard, this section provides an introduction to tackle the problem. We will dive into a detailed explanation of the issue and provide solutions to unlock your keyboard effectively.
Lenovo Laptop Keyboard Locked: Explanation of the Problem:
Being locked out of your Lenovo laptop keyboard can be frustrating. But you can get back access to your keyboard by following some steps.
- Restart: A simple reboot can help fix the issue.
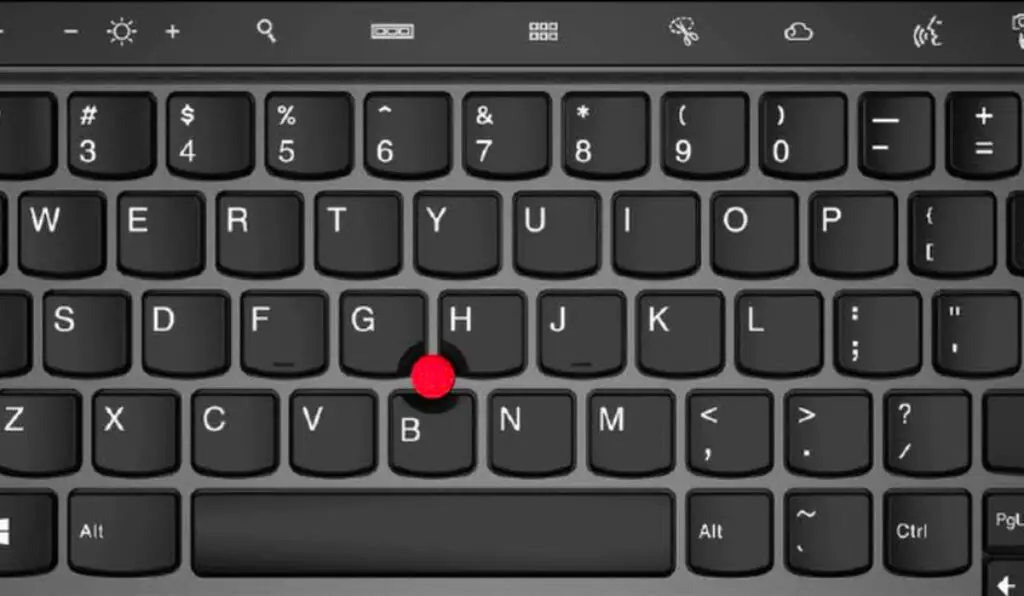
- Check the function keys: Lenovo keyboards usually have an "Fn" or "F Lock" key, which can either lock some keys or disable the entire keyboard. Pressing this key may unlock the keyboard.
- Update or reinstall drivers: Outdated or corrupted drivers can cause keyboard issues. Get the latest drivers from the official Lenovo website. Or, try uninstalling the current drivers and let Windows automatically reinstall them.
- Use an external keyboard: You can connect an external USB or wireless keyboard as a temporary solution if you can’t unlock the laptop keyboard.
- Perform a system restore: Reverting the laptop’s settings back to a previous working state may undo any changes that are causing the keyboard lockout.
- Seek professional help: If none of these steps work, contact Lenovo customer support or take your laptop to a certified technician.
Remember, you should follow each step carefully and in sequence until the issue is resolved.
Troubleshooting Steps: How to Unlock Lenovo Laptop Keyboard
To troubleshoot issues with your Lenovo laptop keyboard, follow these steps to find solutions. Check for physical obstructions, restart your laptop, and use the On-Screen Keyboard. For more advanced solutions, update or reinstall keyboard drivers and try an external keyboard. Resolve keyboard problems with ease!
Step 1: Check for physical obstructions
Physical obstructions can create a host of issues. Let’s tackle them head-on! Here’s a quick guide:
- Inspect the area: Look for any objects, wires, or dust that may be blocking the device.
- Clear away obstacles: Once identified, take steps to remove all obstacles that are stopping the device from working.
- Clean up dust: Dust build-up can get in the way of proper functioning. Use cleaning tools to get rid of dust.
- Check ventilation: Make sure airflow is not blocked by objects or dust. This helps prevent overheating.
Proactive prevention is key to avoiding malfunctions and prolonging the lifespan of the equipment. Regular maintenance and inspections can help detect potential obstructions early. So, why wait? Follow these steps and get rid of physical barriers now. And if all else fails, give your laptop a good pep talk and threaten it with retirement – it works like a charm!
Step 2: Restart the laptop
Starting up your laptop can be a great way to troubleshoot various problems. Resetting the system will get rid of any annoying temporary glitches or software conflicts. To restart your laptop, follow these simple steps:
- Save your work by closing open programs.
- Click the “Start” menu in the bottom-left corner.
- Choose “Power” from the menu.
- Pick “Restart” from the list.
- Wait for the laptop to shut down and turn it back on.
Doing this may help to fix whatever issue you’re dealing with. Restarting your laptop may also be necessary if it’s unresponsive or freezes. It’s also needed when installing updates or software. So, restarting should be your first step if something goes wrong.
You can always use the on-screen keyboard if you don’t want anyone to see you typing.
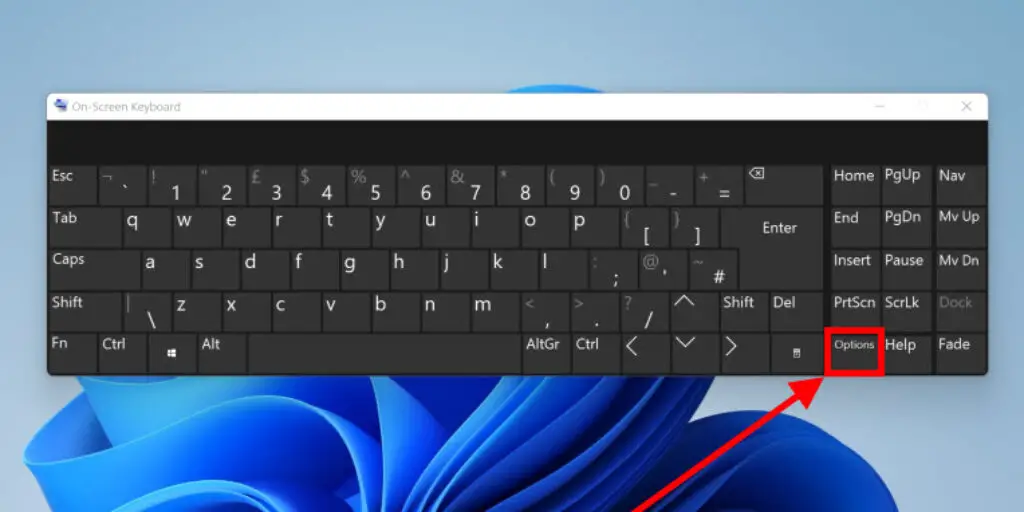
Step 3: Use the On-Screen Keyboard
Using the on-screen keyboard is a must if you are troubleshooting. It helps you input text if the physical one isn’t working. Follow this guide:
- Click the Windows logo to open the Start menu.
- Search “On-Screen Keyboard”. Press Enter.
- The On-Screen Keyboard window appears.
- To type, click on the keys with your mouse or use your touch screen.
- Adjust the size and position of the virtual keyboard to your liking.
Using the on-screen keyboard may be slower than the physical one, but it works as a temporary solution. Be patient and follow the steps for a successful troubleshooting process.
Step 4: Update or reinstall keyboard drivers
Updating or reinstalling keyboard drivers is a must when tackling keyboard issues. Follow this guide for the best results:
- Identify the driver: Find the driver suitable for your keyboard in the Device Manager or on the manufacturer’s website.
- Download the latest version: Go to the manufacturer’s website and search for the most up-to-date driver that matches your keyboard’s model and operating system.
- Uninstall the current driver: Open the Device Manager, locate your keyboard, right-click it, and select “Uninstall.” Confirm if necessary.
- Install the new driver: Run the downloaded installation file and follow the instructions. Restart your PC if needed.
- Check functionality: Test your keyboard once the installation is complete to ensure it works.
Check for Windows updates and software conflicts that may be causing keyboard problems. Updating or reinstalling the driver can improve your typing experience. Make sure the driver is regularly updated for maximum performance and compatibility.
If all else fails, try an external keyboard – sometimes your laptop won’t do!
Step 5: Try an external keyboard
Got a tricky troubleshooting dilemma? Let’s get those external keyboards out to help us tackle it! Here’s how to do it:
- Plug the keyboard into your device.
- Make sure it’s connected securely.
- Test it out – type some text.
- If it works, it could be that your device’s internal keyboard is the issue.
- Restart your device and check if the problem is solved.
- If the issue remains, you may need to seek out a professional technician.
Plus, check for any software updates or driver issues that may be affecting your keyboard. With these steps, you can find out if an external keyboard can fix your keyboard troubles!
Advanced Solutions for Lenovo Laptop Keyboard Locked
To resolve advanced issues with your Lenovo laptop keyboard, turn to the section on “Advanced Solutions.” Address common problems and determine the best course of action with solutions like adjusting keyboard settings, resetting BIOS settings, or performing a system restore. Navigate through these sub-sections for the right solution tailored to your needs.
Solution 1: Adjust keyboard settings
Tweak your keyboard settings for improved typing performance and efficiency! Here’s how:
- Enable/Disable Keyboard Shortcuts: Head to the settings menu and pick which keys you want to do specific tasks. This makes navigating easier.
- Adjust Key Repeat Delay: Change the key repeat delay to suit your preference. This is how long you need to press a key for it to start repeating characters.
- Change Keyboard Language: Select the language you type in. This will avoid spelling errors and autocorrect blunders.
By adjusting these settings, you can optimize productivity without any trouble. It’s worth exploring and customizing your keyboard settings—you’ll be glad you did!
Solution 2: Reset BIOS settings
Resetting the BIOS settings is a great way to solve many of your computer’s hardware configuration issues. Here’s how to do it:
- Shut down your computer.
- Locate the BIOS battery on the motherboard.
- Take out the battery and wait 10-15 seconds.
- Reinsert the battery and turn on your computer.
- You’ll see a message that the BIOS settings have been reset.
- Access the BIOS menu to reconfigure any settings you need.
Resetting the BIOS can fix boot failures, system freezes, and hardware conflicts. It restores the default settings and eliminates any potential conflicts that may be causing trouble. Follow these steps to reset your BIOS quickly and get your computer running smoothly! Who needs therapy when you can just hit ‘undo’ on all your computer problems with a system restore?
Solution 3: Perform a system restore
Want to fix tech issues on your computer? System Restore could be the answer! It just takes a few steps.
- Open the Start menu and type “system restore” in the search bar.
- Select “Create a restore point” from the list.
- Go to the “System Protection” tab and choose “System Restore”.
- Pick a restore point from a time when your computer was working properly. Then click “Next” and “Finish” to start the process.
System Restore doesn’t delete personal files, but it’s best to back up first. This can save time and hassle without troubleshooting or getting professional help manually. Try it if you’re having tech problems – it could be your solution!
Conclusion
To conclude, wrap up your troubleshooting journey by reviewing the steps taken, preventing future keyboard lockouts, and leaving you with a closing statement. First, recap the troubleshooting steps to reinforce your understanding. Then, discover final tips to safeguard against future keyboard lockouts. Lastly, conclude with a powerful closing statement to leave a lasting impression.